Juggling multiple email accounts on your iPhone can feel like herding digital cats. One moment you're handling a work crisis, the next you're sifting through personal newsletters, and then there's that account exclusively for online shopping. Without a smart strategy, your iPhone's Mail app can quickly devolve into a chaotic mess, hindering productivity and causing unnecessary stress. But what if you could tame that inbox beast, making your iPhone a hub of organized, efficient communication for all your different email account types?
The good news is, you absolutely can. Your iPhone is a powerful tool for managing a diverse set of email accounts—from your personal iCloud or Google account to professional Exchange servers—with surprising elegance and robust features. It's not just about adding an account; it's about mastering the art of integration, notification, and organization so you can focus on what matters most.
At a Glance: Mastering Email on Your iPhone
- Effortless Setup: Add various email accounts (iCloud, Google, Outlook, Exchange, etc.) through your iPhone's Settings.
- Unified View: See all your emails in one place with the "All Inboxes" feature, or switch between individual accounts.
- Smart Organization: Utilize built-in "Smart Mailboxes" (Unread, VIP, Flagged) to instantly prioritize important messages.
- Custom Notifications: Tailor alerts for each account, ensuring critical emails grab your attention while others wait.
- Storage Savvy: Adjust "Mail Days to Sync" and manage attachments to keep your iPhone running smoothly.
- Troubleshooting Toolkit: Learn to diagnose and fix common issues like sync problems, incorrect passwords, or notification glitches.
- Advanced Control: Master features like default sending accounts, quick switching, and even email automation with Shortcuts.
Why Bother? The Power of Multiple Inboxes on Your iPhone
In today's interconnected world, most of us operate with several digital identities. Your work persona needs a separate space from your personal life, and your promotional sign-ups definitely shouldn't clutter your primary inbox. This isn't just about tidiness; it’s about strategic advantage.
- Crystal-Clear Organization: Imagine work emails never mingling with your weekend plans. By separating accounts, you create distinct digital environments for different aspects of your life, making it easier to find what you need when you need it.
- Unrivaled Efficiency: Instead of logging into separate apps or web interfaces, your iPhone brings all your inboxes into one centralized location. This means fewer taps, less context switching, and more time for actual work (or play).
- Seamless Flexibility: Whether you're a freelancer managing client communications, a student balancing academic and personal accounts, or someone juggling multiple side hustles, multiple email accounts on your iPhone provide the flexibility to manage diverse responsibilities from a single, portable device.
- Enhanced Privacy & Security: Keeping work and personal accounts separate helps maintain boundaries. Should one account ever be compromised, the others remain isolated, limiting potential damage. It's a simple yet effective layer of digital self-defense.
- Built-in Backup & Redundancy: Having alternative communication channels can be a lifesaver. If an issue arises with one provider, you still have other accounts accessible, ensuring you're never completely cut off.
Your Email Toolkit: Understanding Account Types
Before we dive into the "how-to," a quick primer on the different types of email accounts is helpful. Your iPhone's Mail app is incredibly versatile, supporting nearly every major email service, each often relying on specific protocols:
- iCloud Mail: Apple's native email service, deeply integrated with your iPhone, iPad, and Mac. It’s perfect for those fully invested in the Apple ecosystem.
- Google (Gmail): The world's most popular email service, known for its powerful search, integration with Google Workspace (Docs, Drive, Calendar), and robust spam filtering.
- Outlook (Microsoft Exchange & Outlook.com): Microsoft's comprehensive email solution. Outlook.com is for personal use, while Exchange is a staple in corporate environments, offering advanced calendaring, contacts, and security features.
- Yahoo Mail: A long-standing email provider, still popular for personal use.
- Other (IMAP/POP3): For lesser-known providers or custom domains, you'll typically configure them using either IMAP or POP3. This brings us to the crucial distinction:
- IMAP (Internet Message Access Protocol): This is the modern, recommended protocol. IMAP keeps your emails on the server, allowing you to access them from multiple devices (iPhone, iPad, computer) and always see the same, up-to-date inbox. If you read an email on your iPhone, it shows as read everywhere else.
- POP3 (Post Office Protocol version 3): An older protocol that typically downloads emails to your device and then deletes them from the server. This means if you check email on your iPhone, it might disappear from your computer. We generally advise against POP3 unless specifically required by your provider or an old setup, as it severely limits multi-device access.
When you add an account like Google or Outlook, your iPhone usually sets it up automatically using the best protocol (IMAP or Exchange). For "Other" accounts, you might need to manually input server details, but your iPhone will try to detect them first.
Getting Started: Adding an Email Account to Your iPhone
Adding an email account to your iPhone is a straightforward process, designed to get you up and running in minutes. Here’s how you do it:
- Open the Settings App: Look for the gray gear icon on your home screen.
- Navigate to Mail: Scroll down until you see "Mail" and tap on it.
- Access Accounts: Tap "Accounts." This is where you'll see all your existing email setups.
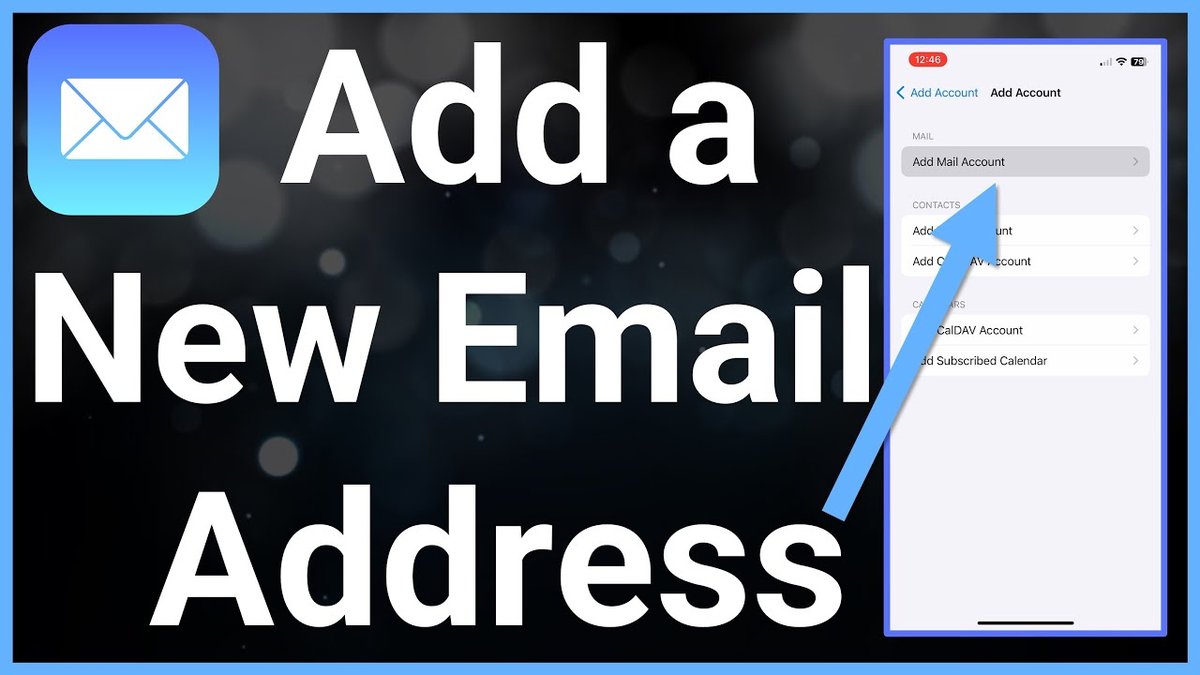
- Initiate "Add Account": Tap "Add Account."
- Choose Your Provider: You'll see a list of popular email services: iCloud, Google, Yahoo, Outlook.com, and Exchange. If your provider isn't listed, tap "Other" at the bottom.
- Follow On-Screen Prompts:
- For major providers (Google, Outlook, Yahoo): You'll be redirected to your provider's login page (often within a secure browser window) to enter your email address and password. You might also be asked to grant permission for the iPhone to access your mail, contacts, calendars, and notes. This is normal.
- For Exchange: You'll typically enter your email address, then potentially your server name, domain, username, and password, depending on your organization's setup. Your IT department can provide these details.
- For "Other": Enter your name, email address, password, and a description for the account. Your iPhone will attempt to find the server settings automatically. If it can't, you might need to manually input IMAP/POP3 server details, which your email provider should supply (often found in their support documentation under "iPhone settings" or "manual configuration").
- Enable Sync Features: After successful authentication, you’ll be prompted to choose which data you want to sync with your iPhone for that account. This usually includes Mail, Contacts, Calendars, and Notes. Toggle on what you need.
- Save: Tap "Save" in the upper right corner, and your new account will be added to your iPhone's Mail app!
Repeat this process for every email account you wish to manage on your device.
Navigating Your Digital Mailroom: Switching and Unifying Inboxes
Once you have multiple accounts set up, the iPhone Mail app offers elegant ways to navigate them, allowing you to see everything at once or focus on a single inbox.
Switching Between Individual Accounts
To view emails from a specific account:
- Open the Mail App: Tap the blue-and-white envelope icon.
- Go to Mailboxes View: If you're currently in an inbox, tap the < Mailboxes button in the upper left corner. This takes you to a screen showing all your mailboxes.
- Select Your Account: Under the "Accounts" section, you’ll see each email account listed. Tap on the specific account you want to view, and its inbox will appear.
The Power of the Unified Inbox: "All Inboxes"
For those times when you need to see everything, the "All Inboxes" feature is a game-changer. It pulls emails from all your configured accounts into one consolidated stream, perfect for a quick overview or ensuring you don't miss anything.
To access your Unified Inbox:
- Open the Mail App.
- Go to Mailboxes View: Tap < Mailboxes in the upper left.
- Tap "All Inboxes": This option is typically at the very top of the "Mailboxes" screen.
Staying Organized: Smart Mailboxes and Folder Power
Beyond simply viewing your emails, the iPhone Mail app offers robust tools to keep your inboxes tidy and prioritize what matters.
Leveraging Smart Mailboxes
Smart Mailboxes are built-in filters that automatically categorize emails based on specific criteria, giving you quick access to important messages without manually sorting them.
- Open the Mail App.
- Go to Mailboxes View: Tap < Mailboxes.
- Edit Your Mailboxes: Tap "Edit" in the top-right corner.
- Enable Smart Mailboxes: You'll see options like "Unread," "Flagged," and "VIP." Toggle these on to display them in your Mailboxes list.
- Unread: Shows all emails across all accounts that you haven't opened yet. Essential for quickly catching up.
- Flagged: Collects all emails you've manually flagged for follow-up. A great way to mark actionable items.
- VIP: This is particularly powerful. You can add important contacts (like your boss, family members, or key clients) to a VIP list. Emails from these senders will automatically appear in the VIP mailbox, and you can even set special notifications for them.
- Actionable Insight: To add someone to VIP, open an email from them, tap their name in the header, and then tap "Add to VIP." You can also manage your VIP list directly in Settings > Mail > Notifications > VIP.
Creating Custom Folders
Sometimes, you need more granular control than Smart Mailboxes offer. Custom folders (or mailboxes) allow you to manually organize emails into categories you define.
- Open the Mail App.
- Go to Mailboxes View: Tap < Mailboxes.
- Add New Mailbox: Tap "Edit" in the top-right corner, then tap "New Mailbox" at the bottom.
- Name and Locate: Give your new mailbox a descriptive name (e.g., "Project X," "Family Receipts"). Choose where to create it: either under a specific account (e.g., "On My iPhone" or under your Gmail account) or as a local mailbox on your device.
- Move Emails: To move an email to a folder, open the email, tap the folder icon (looks like a folder with a left arrow) at the bottom, and choose your destination folder.
Tailoring Your Alerts: Customizing Email Notifications
Not all emails are created equal. Getting a chime for every promotional offer is distracting, but missing a critical work email is unacceptable. Your iPhone allows you to customize notifications for each account.
- Open the Settings App.
- Navigate to Mail: Scroll down and tap "Mail."
- Tap Notifications: This will take you to the notification settings for the Mail app.
- Customize by Account: Under the "Mail Alerts" section, tap on the specific email account you want to configure.
- Adjust Notification Style:
- Alerts: Choose how alerts appear (Lock Screen, Notification Center, Banners).
- Sounds: Select a unique alert tone for this account.
- Badges: Decide if you want a badge count for unread emails from this account.
- Toggle VIP Alerts: If you use the VIP feature, you can choose to override regular notification settings for VIPs, ensuring those critical emails always get through.
Actionable Insight: Set a distinct, perhaps more urgent, alert tone for your work email and a softer, less intrusive tone for personal or promotional accounts. For total silence during specific hours, leverage Settings > Focus (e.g., "Work" or "Sleep" focus) to selectively mute notifications from certain apps or accounts.
Keeping It Lean: Managing Email Storage on Your iPhone
Emails, especially those with large attachments, can quickly consume valuable storage space on your iPhone. Proactively managing this can prevent performance slowdowns.
- Limit "Mail Days to Sync":
- Go to Settings > Mail > Accounts.
- Select the specific email account.
- Tap Mail Days to Sync (or "Download New Mail" for some account types).
- Choose a shorter timeframe, such as "1 Month," "2 Weeks," or even "1 Week." This tells your iPhone to only download emails from that period, reducing the amount of data stored locally. Older emails will still be on the server, accessible when you search for them or via a web browser.
- Address Large Attachments:
- The Mail app itself doesn't have a direct "delete attachments" button, but you can target them. In any mailbox, use the search bar and type "has:attachment." This will show all emails containing attachments.
- You can then review these emails and delete those with large, unnecessary attachments.
- Actionable Insight: When sending large files, especially from your iPhone, consider using iCloud Mail Drop. This feature automatically uploads large attachments to iCloud and sends a link to the recipient, avoiding email size limits and not clogging your or their inbox with massive files. It's much more efficient than embedding large files directly.
Beyond the Basics: Advanced Email Management Strategies
Once you're comfortable with the fundamentals, these advanced tips can further streamline your email workflow.
Setting a Default Sending Account
If one email account is your primary sender (e.g., your work email), you can set it as the default, saving you a tap every time you compose a new message.
- Go to Settings > Mail > Default Account.
- Select the account you wish to be your primary sender.
Quick Swapping "From" Addresses
Even with a default account, you'll often need to send an email from a different address. The Mail app makes this incredibly easy when composing a new message:
- When you start a new email, the "From" field will display your default account.
- Simply tap on the "From" field. A list of all your configured accounts will appear, allowing you to quickly select the desired sending address.
Optimizing "Fetch New Data" for Performance
How often your iPhone checks for new emails impacts both battery life and immediacy of delivery.
- Go to Settings > Mail > Accounts > Fetch New Data.
- Push: (If supported by your email provider, e.g., iCloud, Exchange) Emails are delivered immediately to your iPhone as they arrive on the server. This is the fastest but can consume more battery.
- Fetch: Your iPhone checks for new emails at set intervals (e.g., every 15, 30, 60 minutes). This is a good balance for most users, conserving battery compared to Push.
- Manual: Emails only update when you open the Mail app and manually refresh an inbox. Best for accounts you check infrequently.
- Per-Account Settings: You can also configure Push/Fetch/Manual settings for individual accounts. For example, you might set your work email to "Push" and your promotional email to "Manual."
Archiving vs. Deleting: A Crucial Distinction
Many users don't realize the difference, but it's important for managing your storage and keeping your inbox clean without losing vital information.
- Deleting: Moves an email to the Trash or Bin folder. After a certain period (set by your email provider, typically 7-30 days), emails in Trash are permanently deleted from the server and all devices. Use this for emails you'll truly never need again. If you're looking to remove an entire email account from your device, you’ll want to delete the account entirely.
- Archiving: Moves an email out of your Inbox into an "Archive" folder (or "All Mail" in Gmail). This keeps the email on the server, accessible via search, but removes it from your main inbox view. It's ideal for emails you want to keep for reference but don't need cluttering your active inbox.
- To change default action: Go to Settings > Mail > Accounts, select an account, then Account > Advanced > Move Discarded Messages Into and choose "Archive Mailbox" or "Deleted Mailbox."
Leveraging Provider-Side Filters and Rules
While the iPhone Mail app offers great local organization, truly powerful email management often starts at the source. Most email providers (Gmail, Outlook, Yahoo) allow you to set up server-side rules and filters.
- Access your email provider's website (e.g., mail.google.com, outlook.com).
- In their settings, look for "Filters," "Rules," or "Mail Flow Rules."
- You can set up rules to automatically:
- Move emails from specific senders to certain folders.
- Mark emails as read or even delete them based on keywords in the subject.
- Forward emails to another address.
- Mark emails as spam.
These rules run on the server before emails even reach your iPhone, meaning your inbox is cleaner from the moment you open the Mail app.
Enhance Your Experience: Exploring Third-Party Email Apps
While the built-in Mail app is excellent, a host of third-party apps offer additional features, interfaces, or integrations that might better suit your workflow.
Popular alternatives include:
- Spark Mail: Known for its "Smart Inbox" (prioritizes important emails), quick replies, snooze feature, and team collaboration tools.
- Microsoft Outlook: Excellent if you're heavily invested in the Microsoft ecosystem (Office 365, Teams, Calendar), offering a unified view of your mail, calendar, and files.
- Gmail App: For dedicated Gmail users, this app provides the full Gmail experience, including category tabs (Primary, Social, Promotions), integrated Google Meet, and powerful search.
- Edison Mail: Features a fast search, "Assistant" for subscriptions and travel updates, and a strong focus on privacy.
You can use these apps alongside or as replacements for the built-in Mail app. Simply download them from the App Store and add your accounts within the app.
Automate Your Inbox: Shortcuts App Integration
For those who love efficiency, Apple's Shortcuts app can elevate your email game. You can create custom automations to handle repetitive email tasks.
- Open the Shortcuts App: It's the blue icon with overlapping squares.
- Create a New Shortcut: Tap the "+" in the top-right corner.
- Add Actions: Tap "Add Action" and search for "Mail."
- Explore Mail Actions: You'll find actions like "Send Email," "Find Emails," "Filter Emails," "Mark Emails as Read," and more.
- Customize Your Automation:
- Example: Create a shortcut that, when tapped, finds all unread emails from a specific sender (e.g., "Newsletter X") and marks them as read, or moves them to an archive folder.
- Example: Set up a scheduled automation (under the "Automation" tab in Shortcuts) that, every Friday evening, moves all emails from your "Promotions" mailbox into the trash.
- Save and Run: Name your shortcut and run it manually, or integrate it into a scheduled automation or home screen widget.
Actionable Insight: Start simple. An automation to "archive all emails older than 30 days from my promotional account" can significantly reduce clutter with minimal effort.
When Things Go Sideways: Troubleshooting Common Email Issues
Even with the best setup, email can sometimes be finicky. Here’s a rundown of common problems and how to fix them.
- "Incorrect Password" or "Account Not Verified":
- Double-check: The most common culprit. Re-enter your password carefully.
- Reset: If forgotten, use your email provider's "forgot password" link to reset it.
- App Passwords: For some services with Two-Factor Authentication (2FA) (e.g., Google, Outlook), you might need to generate an "app-specific password" to use with third-party clients like your iPhone Mail app, rather than your main account password. Check your provider's security settings.
- Emails Not Syncing or Delivering:
- Internet Connection: Ensure your iPhone has a stable Wi-Fi or cellular connection.
- Server Status: Check your email provider's status page (e.g., "Gmail Status Dashboard," "Outlook Service Status") for any temporary outages.
- Fetch Settings: Review your Settings > Mail > Accounts > Fetch New Data settings. If it's set to "Manual," you'll only get new mail when you open the app. Change it to "Push" or a shorter "Fetch" interval.
- IMAP vs. POP3: If emails aren't syncing across devices, verify your account is configured as IMAP. POP3 downloads emails to one device and often removes them from the server. If you're using POP3, you might need to delete and re-add the account as IMAP (if supported by your provider).
- iOS Version: Make sure your iPhone is running the latest iOS version via Settings > General > Software Update. Outdated software can sometimes cause compatibility issues.
- Can't See All Accounts in Mailboxes View:
- Visibility Toggle: In the Mail app, go to Mailboxes > Edit. Ensure all desired accounts are toggled "on" in the "Accounts" section.
- Account Enabled in Settings: Go to Settings > Mail > Accounts, tap on the specific account, and ensure the "Mail" toggle is enabled.
- Notifications Not Working:
- Mail Notifications: Double-check Settings > Mail > Notifications for the specific account. Ensure alerts, sounds, and banners are configured as desired.
- Focus/Do Not Disturb: If you have a Focus mode active, it might be suppressing Mail notifications. Check Settings > Focus to adjust allowed apps/people.
- Locked Out of Account:
- Provider Recovery: Follow your email provider's account recovery steps (e.g., Google's account recovery, Microsoft's password reset). This often involves verifying your identity via a recovery phone number or alternate email.
- Two-Factor Authentication (2FA): If you use 2FA, ensure your 2FA method (authenticator app, SMS code) is working correctly.
- Contact Support: If all else fails, contact your email provider's customer support directly.
- Account Not Properly Added:
- Sometimes, an initial setup glitch can occur. If troubleshooting isn't working, try deleting the account (see next section) and then re-adding it from scratch, paying close attention to each step.
Need a Fresh Start? Deleting an Email Account
Whether you've closed an old account, switched providers, or simply want to declutter, removing an email account from your iPhone is quick and easy.
- Open the Settings App.
- Navigate to Mail: Scroll down and tap "Mail."
- Access Accounts: Tap "Accounts."
- Select the Account: Tap on the specific email account you wish to remove.
- Delete Account: Scroll to the bottom and tap Delete Account.
- Confirm: You'll be asked to confirm. Tapping "Delete from My iPhone" will remove the account and all its associated data (mail, contacts, calendars, notes) from your device. It does not delete the account itself from your email provider's servers.
This action simply removes the local copy and access from your iPhone. Your emails will still be safe on the server and accessible via a web browser or another device.
Your Seamless Inbox Awaits
Managing different email account types on your iPhone doesn't have to be a daily struggle. By understanding the tools at your disposal, from initial setup and smart organization to advanced automation and diligent troubleshooting, you can transform your device into a powerhouse of communication. Embrace the unified inbox, customize your notifications, and let your iPhone intelligently sort your digital world. With these strategies, you're not just managing email; you're mastering your digital productivity, one organized inbox at a time.